Motion Sensor Light Using Arduino

This project creates a motion-activated light system using a relay and a motion sensor. When motion is detected, the light connected through the relay turns on for a specified duration and then turns off automatically.
This system is ideal for energy-saving applications where the light only needs to be on when movement is detected.

Component List:
| Name | Quantity | Component |
|---|---|---|
| U1 | 1 | Arduino Uno R3 |
| PIR1 | 1 | -29.588120525879436 , -174.94691695806648 , -170.51321015096335 PIR Sensor |
| K1 | 1 | Relay SPDT |
| L1 | 1 | Light bulb |
| P1 | 1 | 5 , 5 Power Supply |

Working:
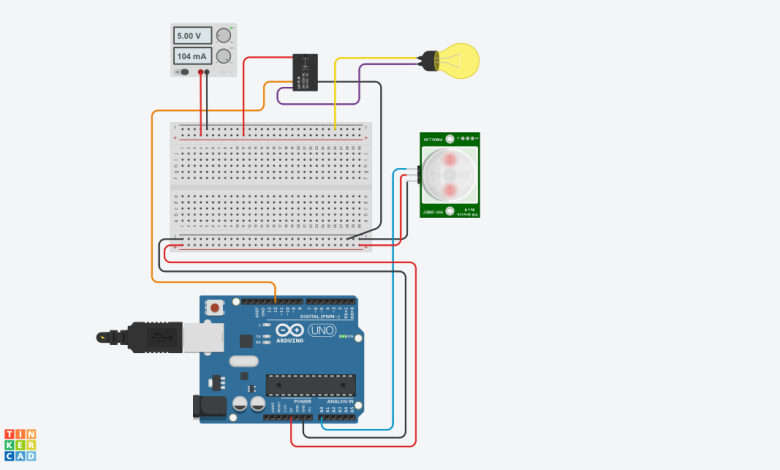
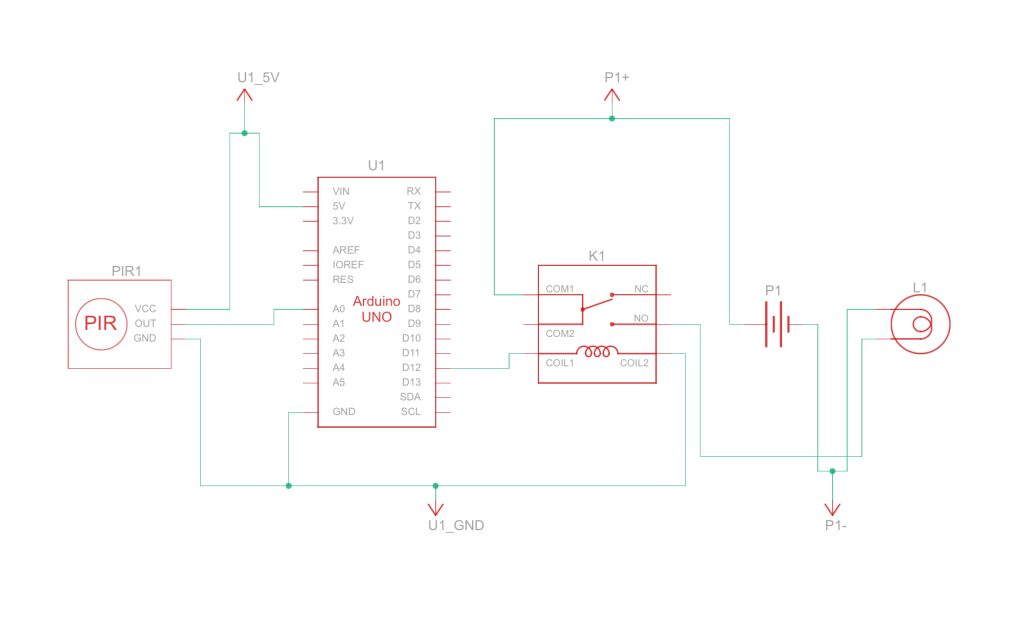
The PIR motion sensor is connected to the Arduino’s analog input pin (A0), while the relay module is connected to digital pin 12.
The Arduino continuously reads the sensor’s output. When motion is detected (the sensor value differs from the relay state), the Arduino activates the relay, turning on the light for 6 seconds.
After the delay, the light turns off, and the system resets, waiting for the next motion detection.
Arduino Code:
int relay = 0;
int sensor = 0;
void setup() {
pinMode(A0, INPUT);
pinMode(12, OUTPUT);
}
void loop() {
relay = digitalRead(12);
sensor = analogRead(A0);
if (relay != sensor) {
digitalWrite(12, HIGH);
delay(6000);
digitalWrite(12, LOW);
} else {
digitalWrite(12, LOW);
}
}
This project provides a simple and effective way to implement motion-activated lighting, perfect for home automation, security systems, or energy-saving lighting solutions.


