Arduino Uno LED Cube
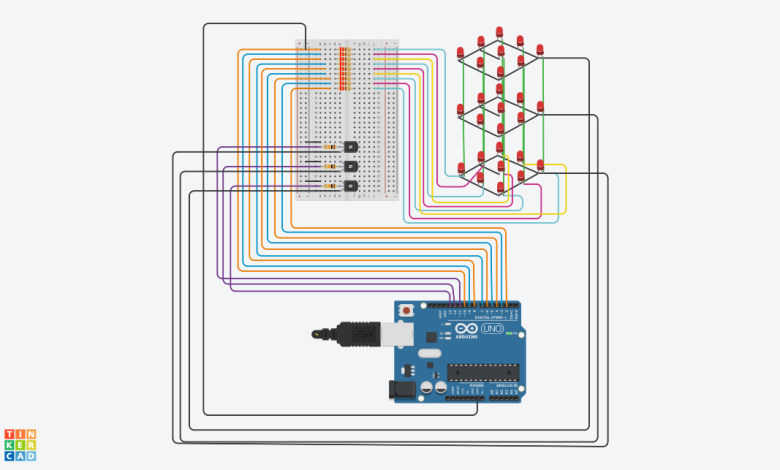
The Arduino Uno LED Cube Project is an engaging venture that transforms a basic LED display into a three-dimensional, animated light show.
Utilizing the versatile Arduino Uno microcontroller, this project involves arranging LEDs into a cube structure. The provided code snippet helps sequence the illumination of LEDs in a visually appealing pattern, creating a captivating display.
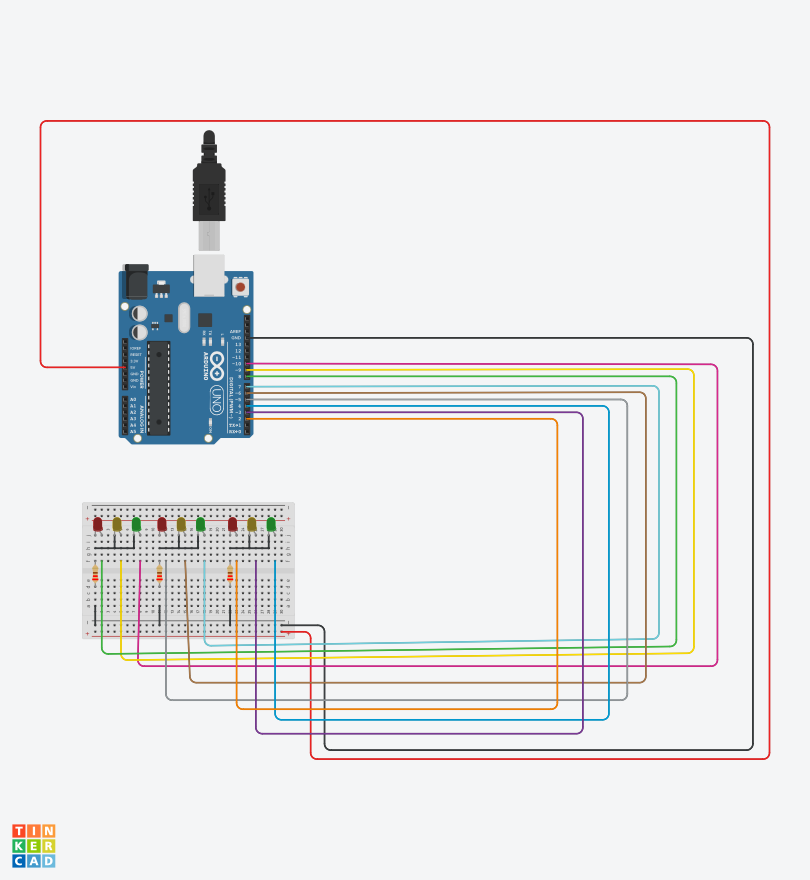
The circuit for the LED cube involves connecting LEDs to the digital pins of the Arduino Uno. The LEDs are organized in a three-dimensional matrix, with each layer representing a different plane of the cube. Transistors or shift registers may be employed to manage the current flow to multiple LEDs simultaneously.
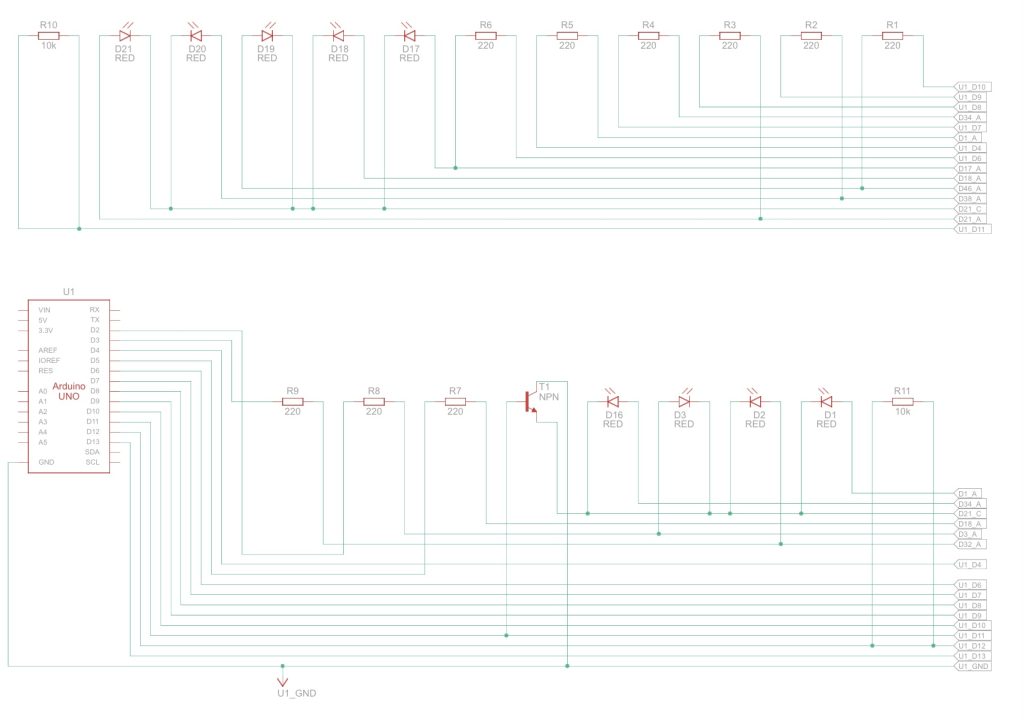
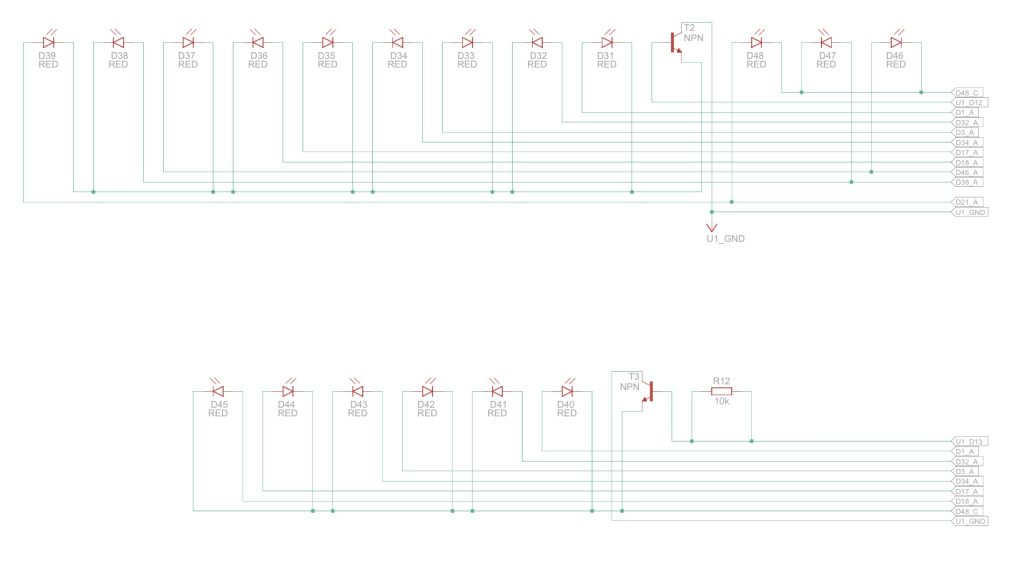
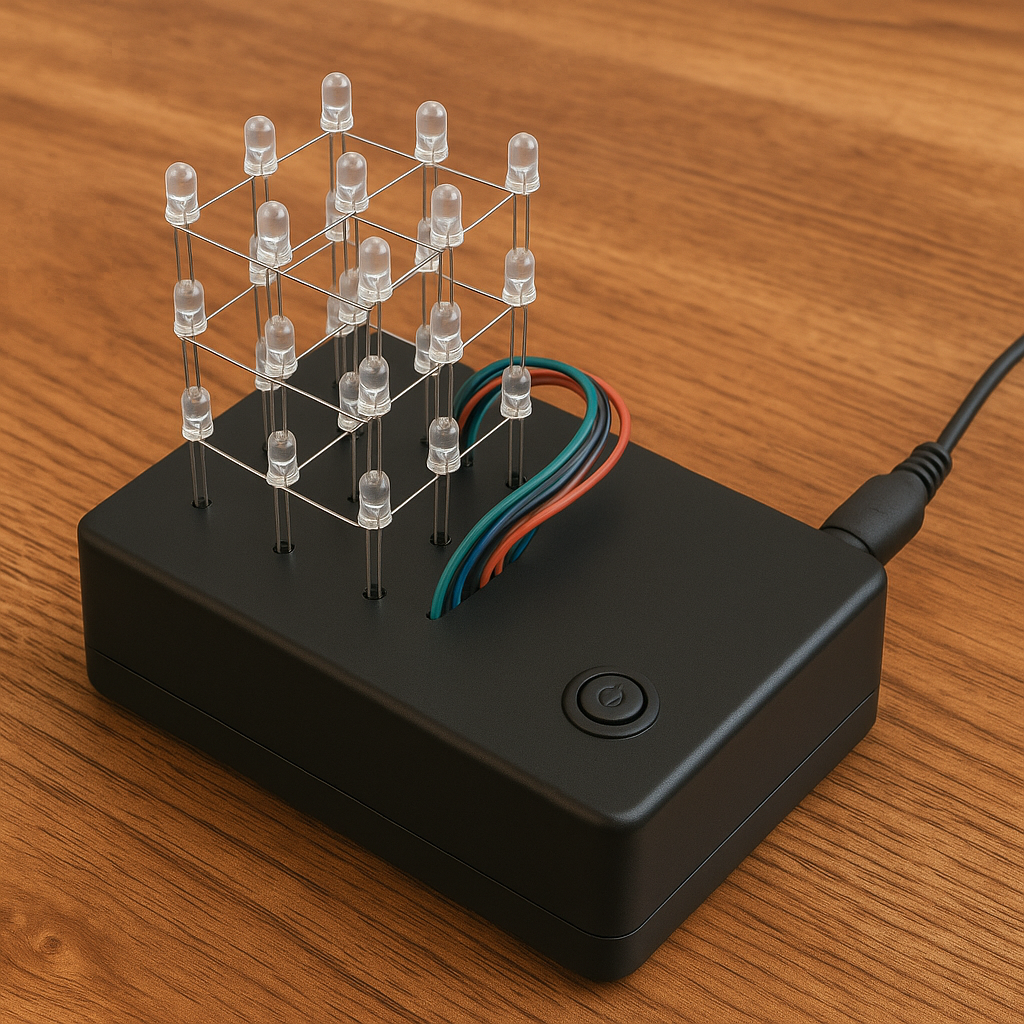
Component List:
| Name | Quantity | Component |
|---|---|---|
| U1 | 1 | Arduino Uno R3 |
| R1 R2 R3 R4 R5 R6 R7 R8 R9 | 9 | 220 Ω Resistor |
| T1 T2 T3 | 3 | NPN Transistor (BJT) |
| R10 R11 R12 | 3 | 10 kΩ Resistor |
| D1 D2 D3 D16 D17 D18 D19 D20 D21 D31 D32 D33 D34 D35 D36 D37 D38 D39 D40 D41 D42 D43 D44 D45 D46 D47 D48 | 27 | Red LED |
Arduino code:
void setup() {
for (int pin = 2; pin < 14; pin++) {
pinMode(pin, OUTPUT);
}
}
void loop() {
for (int pin = 2; pin < 11; pin++) {
digitalWrite(pin, 1);
}
for (int pin = 11; pin < 14; pin++) {
digitalWrite(pin, 1);
delay(500);
}
for (int pin = 13; pin > 10; pin--) {
digitalWrite(pin, 0);
delay(500);
}
}
The Arduino Uno LED Cube Project provides an excellent platform for learning about microcontroller programming, digital electronics, and three-dimensional visualizations.
Beyond its educational value, the LED cube can serve as a mesmerizing decorative piece or a dynamic display for various events. As hobbyists delve into this project, they gain valuable insights into coding, circuit design, and the exciting realm of creative electronics.

