Arduino-based Digital Voltmeter with LCD Display


The Digital Voltmeter project employs Arduino technology to create a user-friendly voltmeter with a Liquid Crystal Display (LCD) for accurate voltage measurement.
The circuit involves a voltage divider network using resistors to scale down the input voltage. The Arduino reads this analog voltage, converts it into a digital value, and displays the result on the LCD screen.
This project is an excellent introduction to voltage measurement techniques and Arduino’s capability to process analog signals.
Component List:
| Name | Quantity | Component |
|---|---|---|
| U1 | 1 | Arduino Uno R3 |
| U2 | 1 | LCD 16 x 2 |
| Rpot2 | 1 | 250 kΩ Potentiometer |
| R1 | 1 | 220 Ω Resistor |
| R2 | 1 | 10 kΩ Resistor |
| R3 | 1 | 1 MΩ Resistor |
| P1 | 1 | 14.7 , 2.3000000000000003 Power Supply |
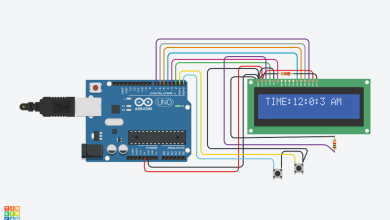
Set up the Arduino and LCD, connecting them via the specified pins.
Construct a voltage divider using resistors to measure the target voltage.
Connect the output of the voltage divider to an analog pin on the Arduino.
The Arduino reads the analog voltage, performs the necessary calculations, and displays the digital voltage on the LCD.
Arduino Code:
#include <LiquidCrystal.h>
LiquidCrystal lcd(12, 11, 5, 4, 3, 2);
float Vs;
float Vout;
int analogVoltage;
float R1 = 1000000.0;
float R2 = 10000;
void setup() {
lcd.begin(16, 2);
}
void loop() {
analogVoltage = analogRead(A0);
Vout = analogVoltage * (5.0 / 1024.0);
Vs = Vout / (R2 / (R1 + R2));
lcd.setCursor(0, 0);
lcd.print("Vs: ");
lcd.print(Vs);
lcd.print("V");
delay(1000);
}
The Digital Voltmeter project serves as an essential tool for electronics enthusiasts, hobbyists, and students to understand voltage measurement principles.
With a clear and concise LCD display, users can easily monitor and measure voltages accurately. The project is versatile and can be extended by adding features like autoranging, multiple voltage scale support, or even data logging, making it an ideal starting point for those diving into digital measurement projects.

