Capacitor Value Measurement with Arduino
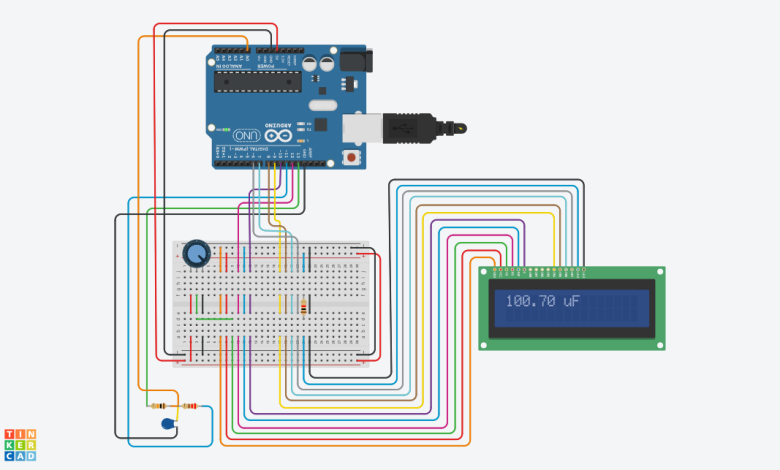

This project involves measuring the value of a capacitor using an Arduino. A capacitor charges through a known resistor, and the time it takes to reach a certain voltage is used to calculate its capacitance.
The Arduino reads the charging time, performs calculations, and displays the capacitor’s value on an LCD screen.
Component List:
| Name | Quantity | Component |
|---|---|---|
| U1 | 1 | Arduino Uno R3 |
| C1 | 1 | 100 uF Capacitor |
| R1 | 1 | 220 Ω Resistor |
| R2 | 1 | 10 kΩ Resistor |
| U2 | 1 | LCD 16 x 2 |
| R3 | 1 | 1 kΩ Resistor |
| Rpot1 | 1 | 250 kΩ Potentiometer |
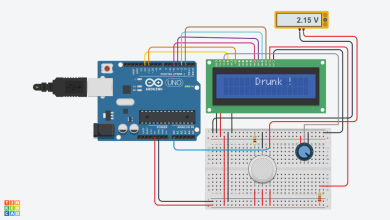
The circuit includes a capacitor under test, a known resistor, and an Arduino with an LCD screen. The capacitor charges through the resistor connected to a charging pin.
The voltage across the capacitor is monitored by an analog pin on the Arduino.
Once a certain voltage is reached, the Arduino records the time taken for charging. The discharge pin is then activated to reset the capacitor for the next measurement.
Arduino Code:
#include <LiquidCrystal.h>
LiquidCrystal lcd(12, 10, 9, 8, 7, 6);
define analogPin 0
define chargePin 13
define dischargePin 11
define resistorValue 10000.0F
include
unsigned long startTime;
unsigned long elapsedTime;
float microFarads;
float nanoFarads;
void setup(){
pinMode(chargePin, OUTPUT);
digitalWrite(chargePin, LOW);
lcd.begin(16, 2);
}
void loop(){
digitalWrite(chargePin, HIGH);
startTime = millis();
while(analogRead(analogPin) < 648){}
elapsedTime = millis() - startTime;
microFarads = ((float)elapsedTime / resistorValue) * 1000;
lcd.print(elapsedTime);
lcd.print(" mS");
delay(2000);
lcd.clear();
delay(500);
if (microFarads > 1){
lcd.print(microFarads);
lcd.print(" uF");
delay(2000);
}
else{
nanoFarads = microFarads * 1000.0;
lcd.print(nanoFarads);
lcd.print(" nF");
delay(2000);
}
lcd.clear();
digitalWrite(chargePin, LOW);
pinMode(dischargePin, OUTPUT);
digitalWrite(dischargePin, LOW);
while(analogRead(analogPin) > 0){}
pinMode(dischargePin, INPUT);
}
This project provides a simple and effective method to measure capacitor values using Arduino. It is a useful tool for electronics enthusiasts and professionals who need to determine the capacitance of various capacitors quickly.
The LCD display makes it user-friendly, providing a readable output of the capacitor’s value. Additionally, the Arduino allows for easy modification and integration into more complex systems or as part of an electronics testing bench.

