Automatic rain‑sensing wipers are now common in modern cars, where the wiper starts moving as soon as raindrops hit the windshield. This project recreates that idea on a small scale using an Arduino Nano, a rain sensor module, and a micro servo. It is perfect as a mini engineering project or classroom demo because it clearly shows how electronics can react to changing weather conditions in real time.
Project idea and working concept
The heart of the project is a rain sensor board that changes its output when water droplets fall on its surface. The sensor output is fed to the Arduino’s analog input pin. When the measured value drops below a chosen threshold (indicating moisture), the Arduino commands a servo motor to sweep a cardboard “wiper blade” across a mock windshield. When the sensor surface dries and the reading goes back up, the servo returns to a rest position and stops wiping.
The project also shows how intensity of rain can be converted into different wiper speeds. Light rain produces slow, occasional wipes, whereas heavy rain makes the wiper move faster and more frequently. This simple control logic mimics the behavior of actual automotive systems that vary wiper speed based on the amount of rain.
Component List:
- Arduino Nano (or compatible board)
- Rain sensor module with matching amplifier/interface board
- Micro servo motor (e.g., SG90 or similar 9 g servo)
- Small breadboard or perfboard
- Jumper wires (male–male and male–female as required)
- 5–9 V battery pack or DC supply with switch
- Cardboard or acrylic sheet to act as a windshield model
- Glue, double‑sided tape, cable ties for neat mounting
The rain sensor modules commonly sold online usually include a separate small PCB that contains an amplifier and comparator, providing a clean analog output for the Arduino.
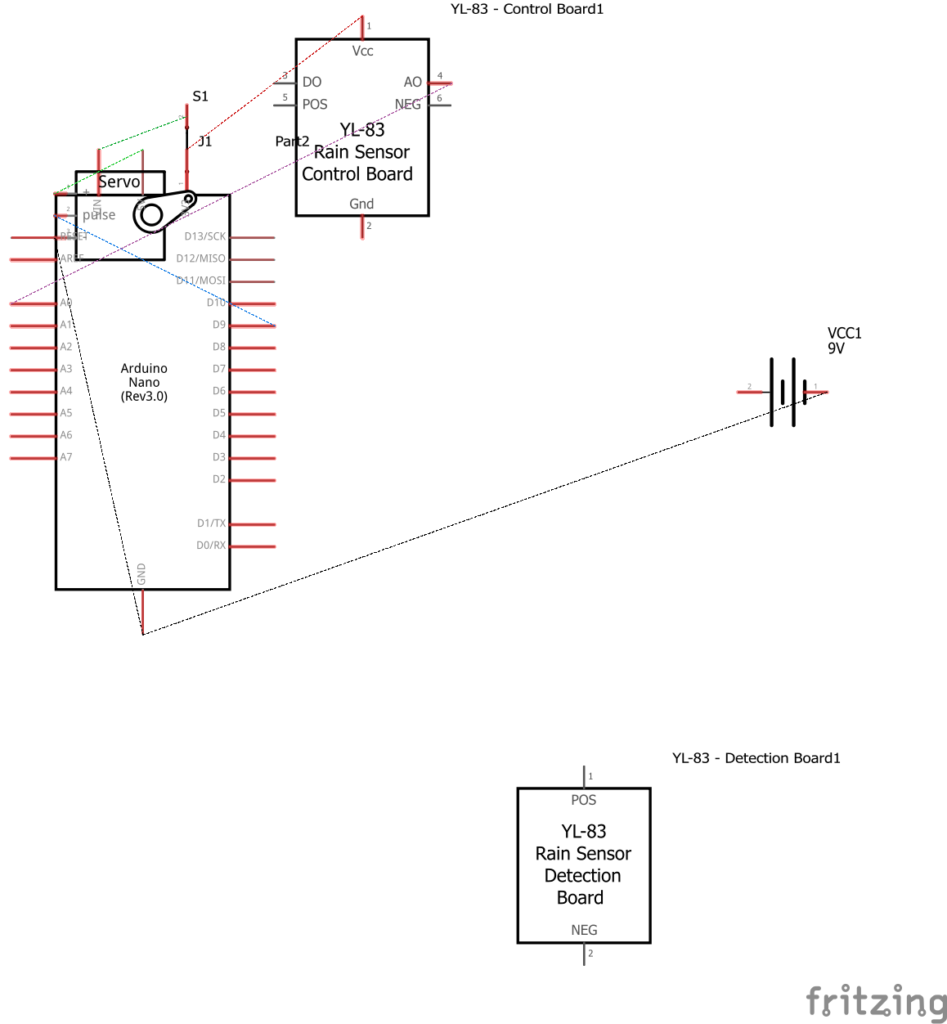
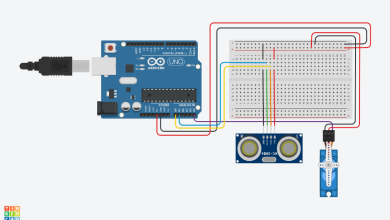
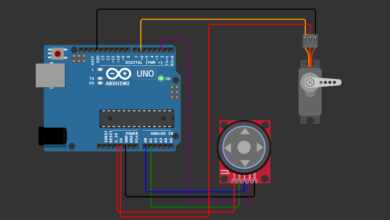
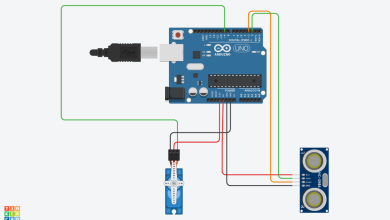
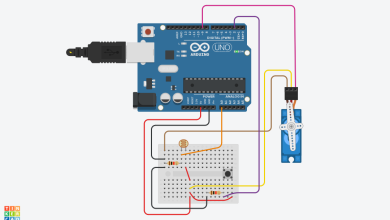
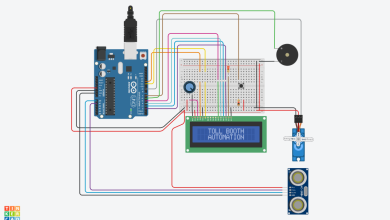
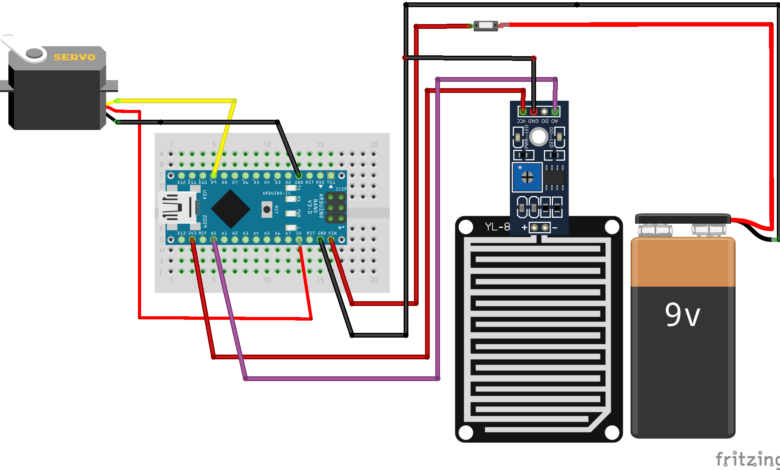
Connections
You can build the circuit on a breadboard and later move it to a small project board or hide it inside a cardboard box for a cleaner school‑project look.
- Connect the rain sensor plate to the amplifier board using the supplied 2‑pin cable.
- On the amplifier module:
- VCC → 5 V pin of Arduino Nano
- GND → GND pin of Arduino Nano
- AO (analog output) → A0 of Arduino Nano
- Connect the servo motor:
- Red wire → 5 V of Arduino Nano (or external 5 V regulator)
- Brown/black wire → GND of Arduino Nano
- Orange/yellow wire → D9 of Arduino Nano
- Power options:
- For a simple demo, supply 5 V to the Nano via USB.
- For a standalone model, use a battery pack feeding VIN or a regulated 5 V rail, and add a small toggle switch in series.
When powering the servo from the same 5 V line as the Nano, make sure the battery or regulator can deliver enough current, as servos draw short bursts of higher current when they start moving.
Arduino code:
#include
Servo wiperServo;
// pin configuration
const int rainSensorPin = A0;
const int wiperServoPin = 9;
// calibration and thresholds (tune these for your sensor)
int sensorValue = 0;
const int dryLevel = 800; // typical dry reading (adjust after testing)
const int lightRainLvl = 650; // light rain threshold
const int mediumRainLvl = 500; // medium rain threshold
// values lower than mediumRainLvl are treated as heavy rain
// wiper sweep angles
const int restAngle = 15; // parking position of wiper
const int minAngle = 10; // start of sweep
const int maxAngle = 160; // end of sweep
void setup() {
wiperServo.attach(wiperServoPin);
wiperServo.write(restAngle);
Serial.begin(9600);
Serial.println("Automatic Rain Sensing Wiper - System Ready");
}
void loop() {
sensorValue = analogRead(rainSensorPin);
Serial.print("Rain sensor value: ");
Serial.println(sensorValue);
// dry condition: keep wiper parked
if (sensorValue > dryLevel) {
wiperServo.write(restAngle);
delay(200);
return;
}
// choose wiper speed based on rain intensity
int sweepDelay;
if (sensorValue <= dryLevel && sensorValue > lightRainLvl) {
// very light rain – slow sweep
sweepDelay = 12;
} else if (sensorValue <= lightRainLvl && sensorValue > mediumRainLvl) {
// medium rain – normal speed
sweepDelay = 7;
} else {
// heavy rain – fast sweep
sweepDelay = 3;
}
// single wipe cycle (forward and back)
sweepWiper(minAngle, maxAngle, sweepDelay);
sweepWiper(maxAngle, minAngle, sweepDelay);
}
// helper function to sweep servo between two angles
void sweepWiper(int startAngle, int endAngle, int stepDelay) {
if (startAngle < endAngle) { for (int angle = startAngle; angle <= endAngle; angle++) { wiperServo.write(angle); delay(stepDelay); } } else { for (int angle = startAngle; angle >= endAngle; angle--) {
wiperServo.write(angle);
delay(stepDelay);
}
}
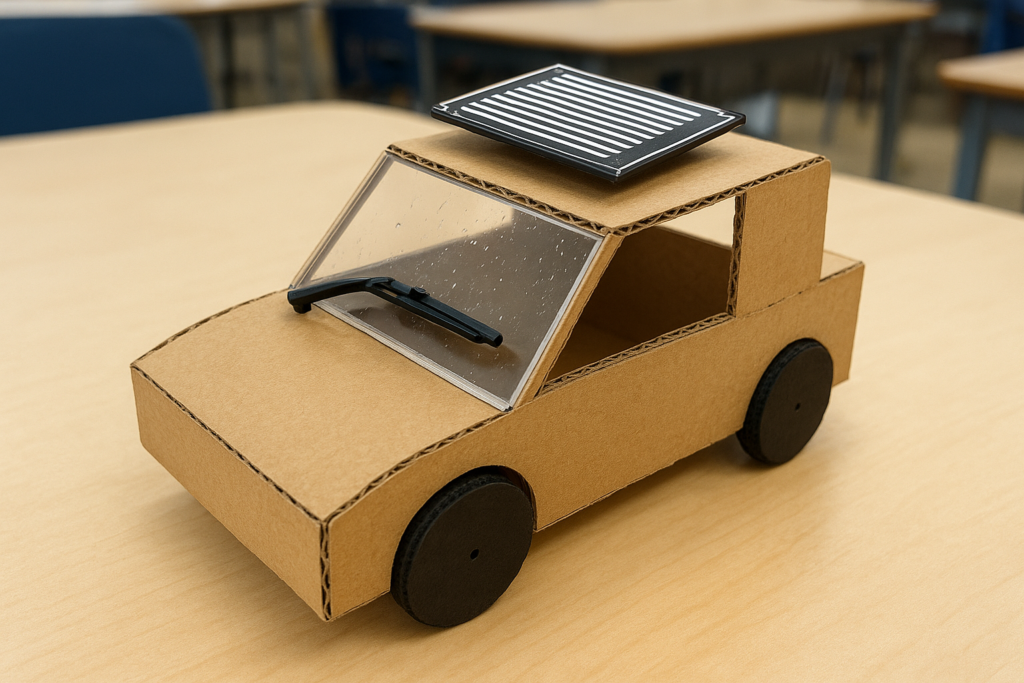
}Building the physical model
To make the project presentation‑ready
- Cut a rectangular cardboard or acrylic sheet to act as the windshield.
- Fix the servo at the bottom edge and attach a thin cardboard strip to the servo horn as the wiper blade.
- Mount the rain sensor on the top portion of the “glass” where water can be dropped easily using a spray bottle or dropper.
- Place the Arduino, battery, and wiring on a white cardboard base and hide them inside a small box for a neat finish.
- Label key parts: “Rain Sensor,” “Arduino Controller,” “Servo Wiper,” and “Battery.”
During demonstration, power on the circuit with the sensor dry and show that the wiper stays at rest. Then spray a light mist of water on the rain sensor and observe the wiper moving slowly. Add more water and show how the wiper speed increases as the sensor reading goes lower. This clearly demonstrates automatic control based on sensed environmental conditions and gives students a solid understanding of how rain‑sensing wipers work in real vehicles.