Arduino-based projects are a great way to learn electronics and programming in a practical and interactive way. One of the most interesting beginner projects is controlling a servo motor using a joystick. This project helps you understand how analog inputs can be used to control real-world devices smoothly.
By using a joystick module, you can manually control the position of a servo motor, just like controlling movement in a game. This concept is widely used in robotics, remote-controlled systems, and automation applications. Whether you are a beginner or someone exploring embedded systems, this project is a perfect starting point.
How This Project Works :
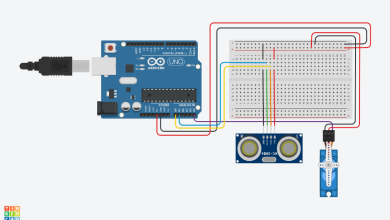
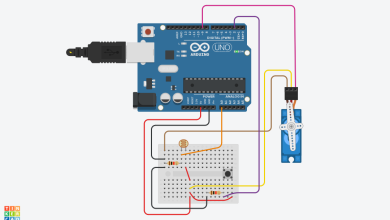
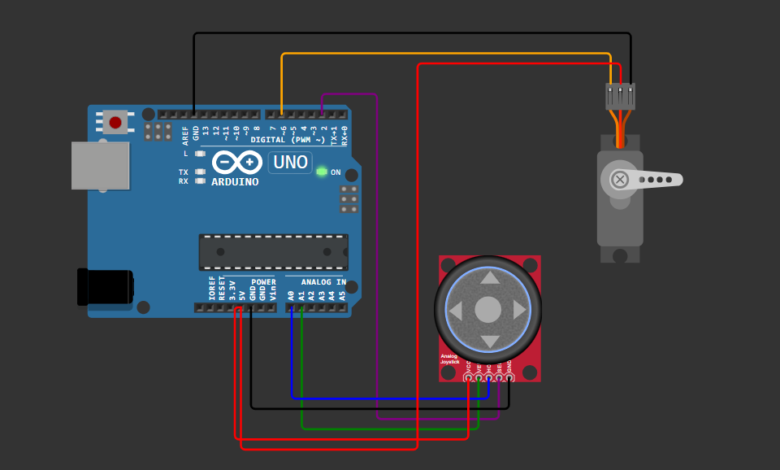
This project demonstrates how to control a servo motor using a joystick module and an Arduino Uno. The joystick acts as an input device that sends analog signals based on its position.
The horizontal axis (X-axis) of the joystick is connected to the Arduino’s analog pin (A0). When you move the joystick left or right, it generates values between 0 and 1023. The Arduino reads these values and converts them into corresponding angles between 0° and 180° using a mapping function.
These angle values are then sent to the servo motor through a digital PWM pin. As a result, the servo rotates smoothly according to the joystick movement. Additionally, the joystick button can be used to reset the servo to its center position (90°).
This project is a great example of combining analog input with motor control, commonly used in robotics and automation systems.
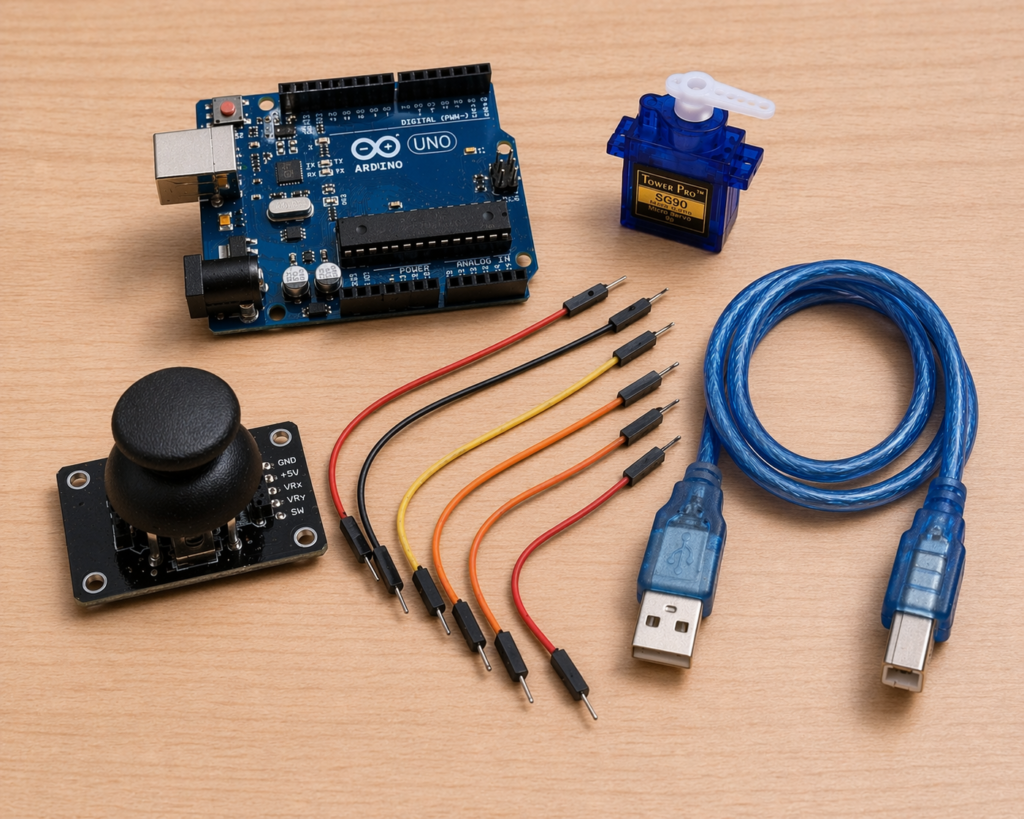
Component List :
| Name | Component | Quantity |
|---|---|---|
| U1 | Arduino Uno | 1 |
| M1 | Servo Motor (SG90) | 1 |
| J1 | Analog Joystick Module | 1 |
| W1 | Jumper Wires | 6–8 |
| P1 | USB Power Cable | 1 |
Complete Connections Details :
1. Joystick Connections:
- VCC → 5V (Arduino)
- GND → GND (Arduino)
- VRx (Horizontal) → A0
- SW (Switch) → D2
2. Servo Motor Connections:
- Red (VCC) → 5V (Arduino)
- Brown/Black (GND) → GND (Arduino)
- Yellow/Orange (Signal) → D6
Arduino Code :
Version 1 : Simple & Reliable
#include <Servo.h>

Servo myServo;

int xPin = A0; // HORZ
int swPin = 2; // button

void setup() {
Serial.begin(9600);
myServo.attach(6); // ✅ matches your diagram.json
pinMode(swPin, INPUT_PULLUP);
}

void loop() {
int xValue = analogRead(xPin);

// Convert joystick to angle
int angle = map(xValue, 0, 1023, 0, 180);

myServo.write(angle);

Serial.print("X: ");
Serial.print(xValue);
Serial.print(" Angle: ");
Serial.println(angle);

delay(20);
}
Version 2 : Smooth Control
#include <Servo.h>

Servo myServo;

int xPin = A0;
int swPin = 2;

int angle = 90;

void setup() {
Serial.begin(9600);
myServo.attach(6); // ✅ D6 from your JSON
pinMode(swPin, INPUT_PULLUP);

myServo.write(angle);
}

void loop() {
int xValue = analogRead(xPin);

Serial.println(xValue);

// Dead zone
if (xValue > 470 && xValue < 550) {
// no movement
}
else if (xValue <= 470) {
angle--;
}
else if (xValue >= 550) {
angle++;
}

angle = constrain(angle, 0, 180);

myServo.write(angle);

// Button → reset to center
if (digitalRead(swPin) == LOW) {
angle = 90;
myServo.write(angle);
delay(300);
}

delay(15);
}
This project is a simple yet powerful introduction to controlling motors using analog input devices. By using a joystick, you can achieve smooth and intuitive control over a servo motor, which is widely used in robotics, camera systems, and automation projects.
Once you understand this concept, you can expand it further by adding more servos for multi-axis control, integrating wireless modules, or building complete robotic systems. It’s a perfect stepping stone for beginners entering the world of Arduino and embedded systems.
This is all about Servo Motor Control with Joystick using Arduino, Thanks for reading.
visit Tinkercircuits.com for more exciting Arduino projects!
Happy Tinkering! — The Tinker Circuits Team