Messy breadboard wiring leads to confusing bugs. Learn beginner-friendly best practices for wiring a breadboard cleanly, safely, and in a way that’s easy to troubleshoot.
Best Practices for Wiring a Breadboard :
A breadboard is where most electronics projects start, but a messy breadboard is also where most beginner headaches start too. Tangled wires make it hard to trace a connection, spot a mistake, or even know if a circuit is wired correctly at a glance. A few simple wiring habits make breadboarding faster, easier to debug, and far less frustrating.
Understand How a Breadboard Is Connected Internally :
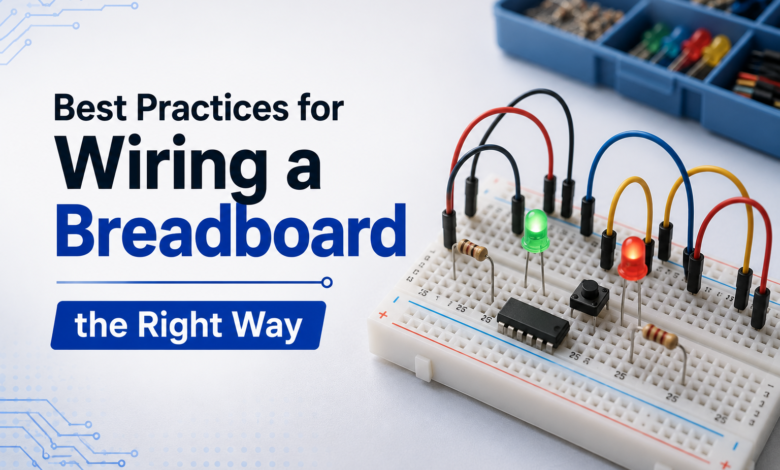
Before wiring anything, it helps to know how the holes are actually connected underneath. The two outer rows on each side (usually marked + and -) run horizontally along the entire board and are meant for power and ground. The main center section is split into columns of five holes, connected vertically in short groups, with a gap down the middle separating the two halves of the board. Knowing this layout prevents accidental short circuits and confusing connections.
Best Practices for Clean Wiring :
- Establish power and ground rails first
Connect your power supply to the + rail and ground to the – rail before adding any components. This gives every part of your circuit an immediate, consistent source of power and ground to branch off from.
- Use colour-coded wires consistently
Pick one color for power (commonly red) and one for ground (commonly black or blue), and stick with it across the whole project. This makes it instantly obvious which wire is which, even weeks later.
- Keep wires short and flat
Long, looping wires are harder to trace and more likely to get snagged or pulled loose. Cut jumper wires to a reasonable length for the distance they need to cover, rather than reusing whatever’s on hand.
- Route wires close to the board
Keep wires flat against the breadboard surface instead of arching them, especially when a project has many connections. This keeps the layout readable and reduces the chance of two exposed wires touching where they shouldn’t.
- Group related components together
Place components that work together, like a sensor and its supporting resistor, physically close to each other on the board. This keeps the circuit visually organised and easier to follow when troubleshooting.
- Leave room to probe with a multimeter
Avoid packing components in so tightly that there’s no exposed space to touch a multimeter probe to a pin or wire. A little breathing room makes testing individual connections much easier.
Common Wiring Mistakes to Avoid :
- Bridging the centre gap accidentally, which can short two halves of the board together
- Mixing up which rows are connected, especially on breadboards where the power rails are split into two separate sections
- Overloading a single hole with too many wires, which can weaken the internal contact and cause an unreliable connection
- Forgetting to connect all grounds together when a project uses more than one power source
Tips for Beginners :
- Build one section of a circuit at a time and test it before adding the next, rather than wiring everything at once and troubleshooting a wall of connections afterward.
- Take a photo of your breadboard layout once it’s working — it’s a fast way to recreate the same circuit later without redoing the wiring logic from scratch.
- Use a multimeter’s continuity setting to double-check a rail or connection you’re unsure about before applying power.
- If a breadboard has split power rails (common on longer boards), bridge them with a jumper wire so both halves share the same power and ground.
Frequently Asked Questions :
- Why do my components stop working when I move them to a different row?
Breadboard columns are only connected vertically in short groups, not across the entire board. Moving a component to a different group breaks its existing connections unless you rewire it.
- Do I need to worry about wire length affecting my circuit?
For most beginner projects, wire length is more about organization than electrical performance. Very long wires can occasionally introduce noise in sensitive circuits, but it’s rarely a concern for typical hobby builds.
- What’s the best way to keep track of a complex breadboard layout?
Sketching your circuit on paper or using a free circuit design tool before wiring it on the breadboard makes it much easier to follow, especially for projects with many components.
Clean breadboard wiring isn’t just about looks — it makes every project easier to build, test, and fix. A few consistent habits, like colour-coding wires and grouping components logically, pay off every time you sit down to build.
Visit tinkercircuits.com for more beginner-friendly Arduino and ESP32 guides.
Happy Tinkering! — The Tinker Circuits Team.