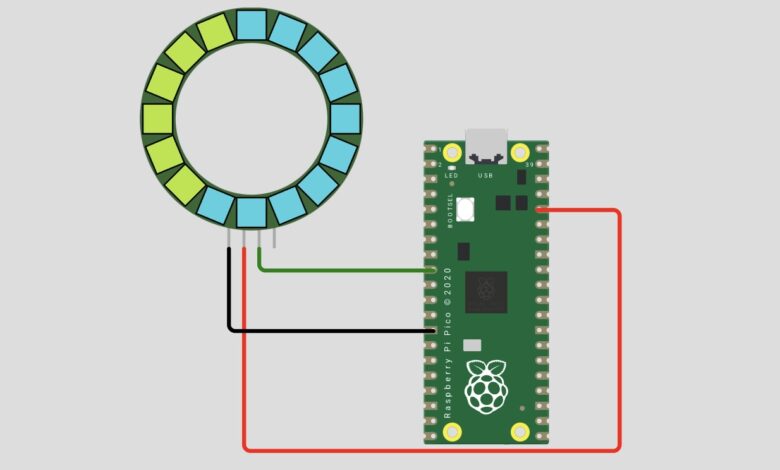
Want to create stunning LED animations with just 3 wires and a few lines of MicroPython code? In this project, we use a Raspberry Pi Pico and a 16-LED NeoPixel ring to create a smooth colour-cycling animation — no soldering, no extra libraries, just plug and play!
What You Will Learn :
- How to connect a NeoPixel ring to Raspberry Pi Pico
- How to control individual NeoPixels using MicroPython
- How to create colour-cycling LED animations
- How to upload MicroPython code using Thonny IDE
Components Required :
| Component | Quantity |
|---|---|
| Raspberry Pi Pico | 1 |
| 16-LED NeoPixel Ring (WS2812B) | 1 |
| Jumper Wires | 3 |
| USB Cable (Micro USB) | 1 |
| Computer with Thonny IDE | 1 |
Libraries Required :
No external libraries needed! The neopixel module is built directly into MicroPython firmware. Once you flash MicroPython onto your Pi Pico, it is ready to use instantly — no installation required.
Circuit Diagram :
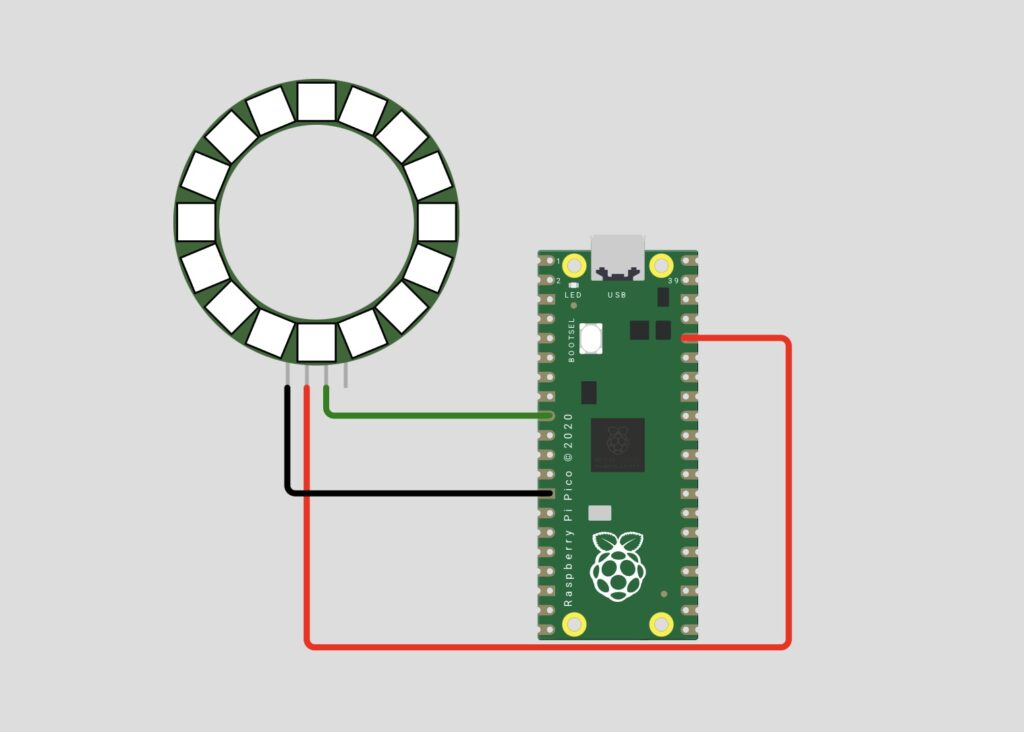
Wiring Table :
| NeoPixel Ring Pin | Pi Pico Pin | Wire Color |
|---|---|---|
| GND | GND | Black |
| Data In | GPIO 17 | Green |
| VCC | VBUS (5V) | Red |
Note: Only 3 wires needed to get your NeoPixel ring running!
How It Works :
- The Pi Pico initializes a NeoPixel ring with 16 LEDs on GPIO 17
- Two colours are defined — a warm green (0xb6, 0xe4, 0x30) and a bright cyan (0x42, 0xd1, 0xe0)
- The code lights up one pixel at a time in sequence around the ring
- Once all 16 pixels are lit, it resets and switches to the next colour
- A 0.1 second delay creates a smooth chasing animation effect
- The loop runs forever, continuously alternating between the two colours
Circuit Simulation :
Watch the NeoPixel ring animate through colours in real time!
Arduino Code :
import time
from neopixel import Neopixel


pixels = Neopixel(17, 0, 6, "GRB")


colors = [
    (0xb6, 0xe4, 0x30),
    (0x42, 0xd1, 0xe0),
]

pixel_index = 0
color_index = 0
while True:
    pixels.set_pixel(pixel_index, colors[color_index])
    pixels.show()
    pixel_index += 1
    if pixel_index == 16:
        pixel_index = 0
        color_index = (color_index + 1) % 2
    time.sleep(0.1)
Code Explanation :
Imports: time handles delays and Neopixel from the built-in neopixel module controls the LED ring.
Neopixel Setup: Neopixel(17, 0, 6, “GRB”) initialises the ring on GPIO 17, using state machine 0, with 6 as the number of LEDs per segment, in GRB colour format (standard for WS2812B LEDs).
Colours List: Two RGB colours are defined — a lime green and a bright cyan. You can change these to any colour you like!
pixel_index: Tracks which LED is currently being lit, counting from 0 to 15.
colour_index: Switches between the two colours each time the ring completes a full cycle.
Main Loop: Each iteration lights one pixel, advances the index, resets at 16, and waits 0.1 seconds — creating the smooth chasing effect.
How to Use :
- Flash MicroPython firmware onto your Raspberry Pi Pico
- Wire the NeoPixel ring as shown in the diagram above
- Open Thonny IDE on your computer
- Connect the Pi Pico via USB
- Copy and paste the code into Thonny
- Save the file as main.py directly onto the Pi Pico
- The animation starts automatically — enjoy the light show! 🌈
Customisation Tips :
- Change colors: Replace the RGB values in the colors list with any color you want — for example (255, 0, 0) for red or (0, 0, 255) for blue
- Add more colors: Extend the colors list with more entries and update % 2 to match the number of colors
- Change speed: Increase time.sleep(0.1) for a slower animation or decrease it for a faster chase effect
- Change LED count: Update pixel_index == 16 to match your NeoPixel ring or strip size
- Rainbow effect: Loop through increasing hue values for a full rainbow animation
FAQ :
Q: Do I need to install any libraries?
A: No! The neopixel module is built into MicroPython. Just flash MicroPython and upload the code.
Q: Can I use a NeoPixel strip instead of a ring?
A: Yes! Just update the LED count in the code to match your strip length.
Q: What MicroPython version should I use?
A: Download the latest stable MicroPython firmware for Pi Pico from the official micropython.org website.
Q: My LEDs are showing wrong colors. What do I do?
A: Try changing “GRB” to “RGB” in the Neopixel setup line — different LED strips use different colour orders.
This project is a perfect introduction to controlling NeoPixels with MicroPython on the Raspberry Pi Pico. With just 3 wires and 20 lines of code, you get a beautiful color-chasing animation that you can endlessly customize. Try it out and make it your own — change the colours, speed, and effects to create something unique!
Visit tinkercircuits.com for more exciting Pi Pico and Arduino projects!
Happy Tinkering! The Tinker Circuits Team